IT IS FINALLY HERE!! The Choice business portal omni channel solution
Business Portal User Guide
Launching to All Merchants October 24, 2022. This page will give you tips, guides & more to help you with the
Choice Business Portal
Watch this short video now to see all the features the Business Portal Offers
Video was created to highlight top features of the Omni-Channel Business Solution by Choice
How to use Users & Roles
A walkthrough of Users and Role Permission Setup. This is a step by step quick guide.
How to use Pay Buttons
A walkthrough of Payment Buttons located in Item Management. Quick Guide.
How to use Pay by Text
A walkthrough of Users and Role Permission Setup. This is a step by step quick guide.
How to use Reporting
A walkthrough of Payment Buttons located in Item Management. Quick Guide.
How to use eGift Card
A walkthrough of Users and Role Permission Setup. This is a step by step quick guide.
How to use Run a Sale
A walkthrough of Payment Buttons located in Item Management. Quick Guide.
The Dashboard
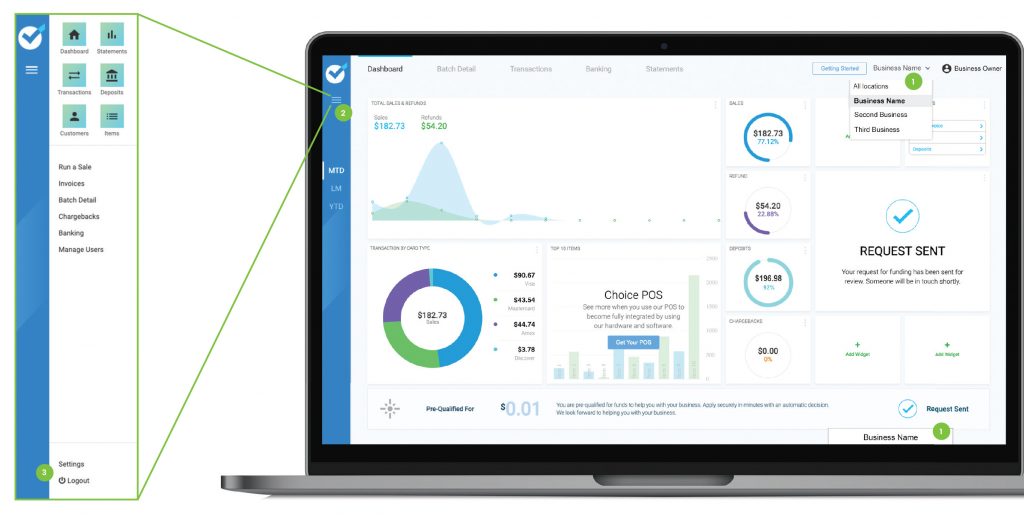
When logging in to the account, the home screen is the company dashboard. This will give a quick snapshot of the transaction history. The reporting feature defaults to the current month of sales (MTD), summarizing Total Sales and Refunds. View reporting for Last Month (LM) and Year to Date (YTD) by clicking the option in the left side blue menu bar. Widgets arranged on the screen provide a more detailed breakdown of this information. These can be moved, added, or deleted to organize the dashboard as you would like.
Image is used for illustration to visualize the instructions on how to use above.
Portal Section Guides and Help
Manage Users
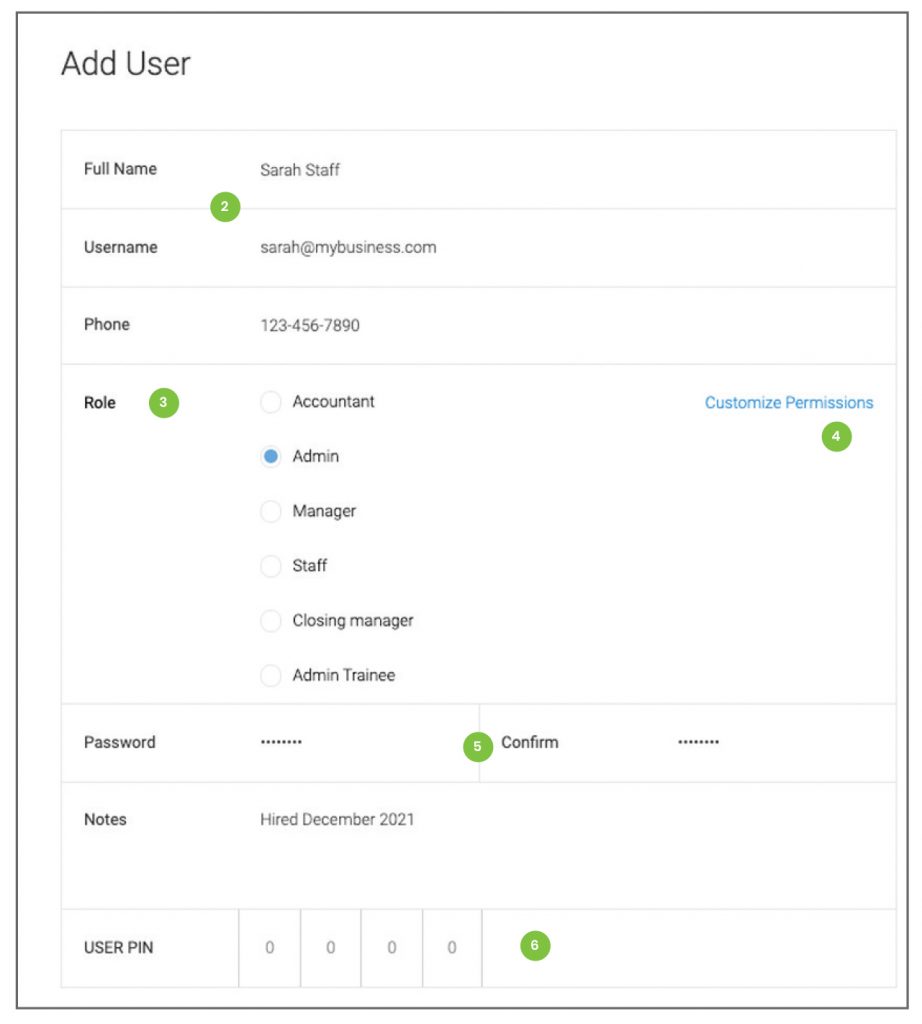
The Manage Users section of the portal will allow administrators to add and edit users in the merchant account.
View Users
Create Users
* Note: The user’s email is their Username a unique email is required for each user.
* Note: Roles can be named, created, and edited in Settings
If a role is customized, a new option will appear at the bottom of the Roles section labeled Custom. This option will be selected. To return to the original settings of the role, click to select that role again.
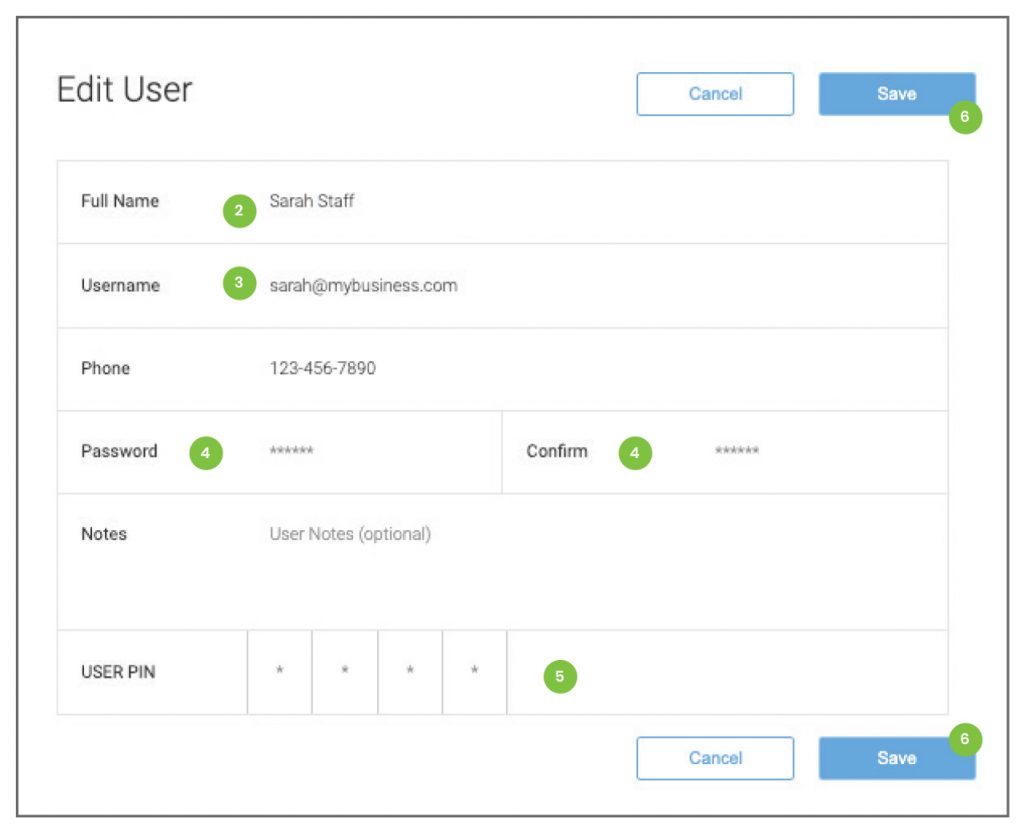
Update & Edit Users
Image is used for illustration to visualize the instructions on how to use above.
Batch Details
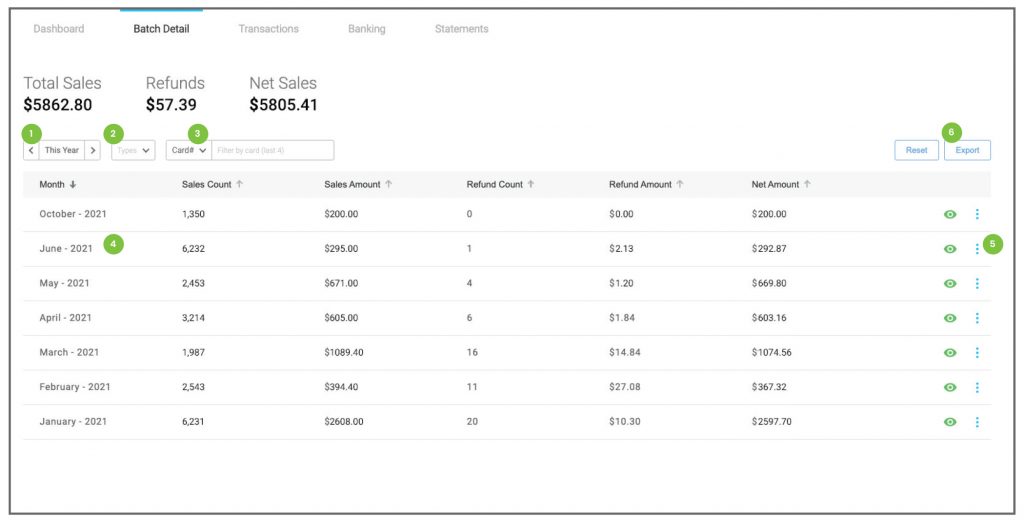
The Batch Detail screen summarizes all batch information directly from elevate. It reflects batches from standalone terminal and point of sale systems as well as batches from the eCommerce tab in the portal. This can be accessed from the tab in the access bar at the top of the screen or the Batch Detail button in the left side menu.
Image is used for illustration to visualize the instructions on how to use above.
Deposits
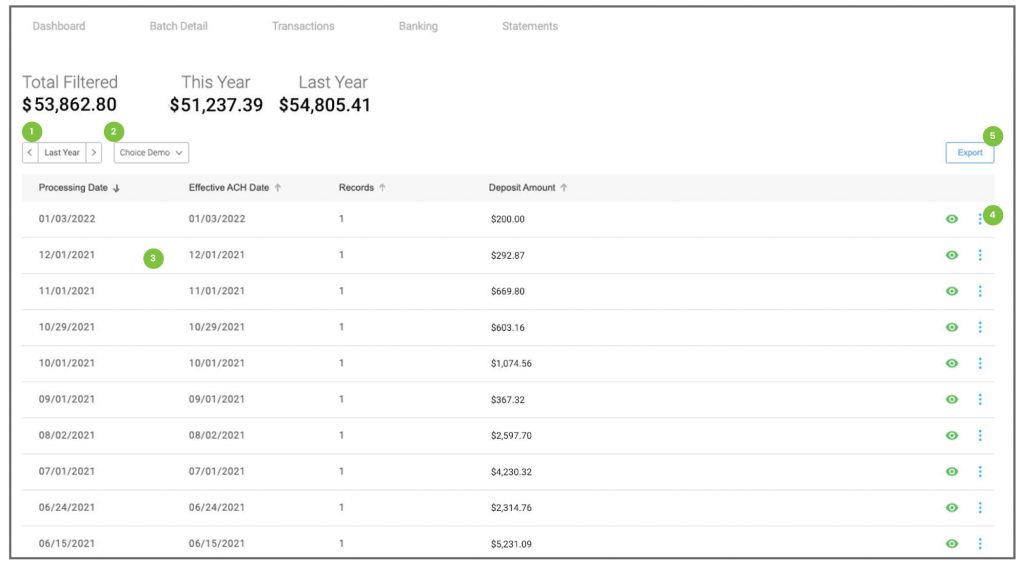
The Deposits screen summarizes all deposits and debits related to processing costs, directly from elevate. This can be accessed from the Deposits button in the left side menu. It reflects deposits from standalone terminal and point of sale systems, the eCommerce tab in the portal as well as any debits for monthly fees.
Image is used for illustration to visualize the instructions on how to use above.
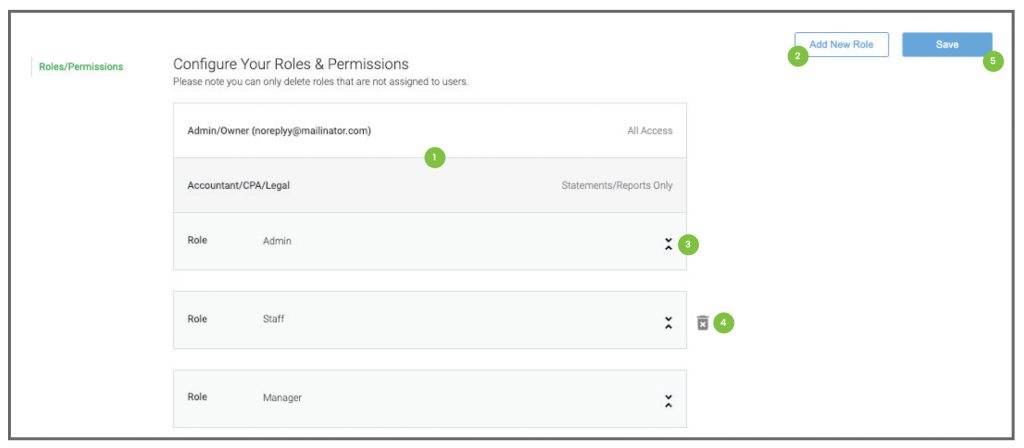
Roles & Permissions
User roles and permissions can be created and defined in the Settings tab. This is located at the bottom of the left side menu drawer and is only accessible by Managers.
Image is used for illustration to visualize the instructions on how to use above.
Chargebacks
Choice sends email notifications to any merchant who receives a chargeback. The emails will be received from donotreply@elevateqs.com and the subject will be New Chargeback Notification. The Chargebacks screen publishes information about any chargebacks reported against a merchant account. Click the Chargebacks tab in the left side menu to view the screen.
Documentation to dispute a chargeback can be delivered through the Elevate Dispute uploader available to all merchants. Each merchant is automatically sent login credentials when they are boarded. A password reset email can be sent if the account wasn’t activated when the login credentials were sent.
Image is used for illustration to visualize the instructions on how to use above.
Statements
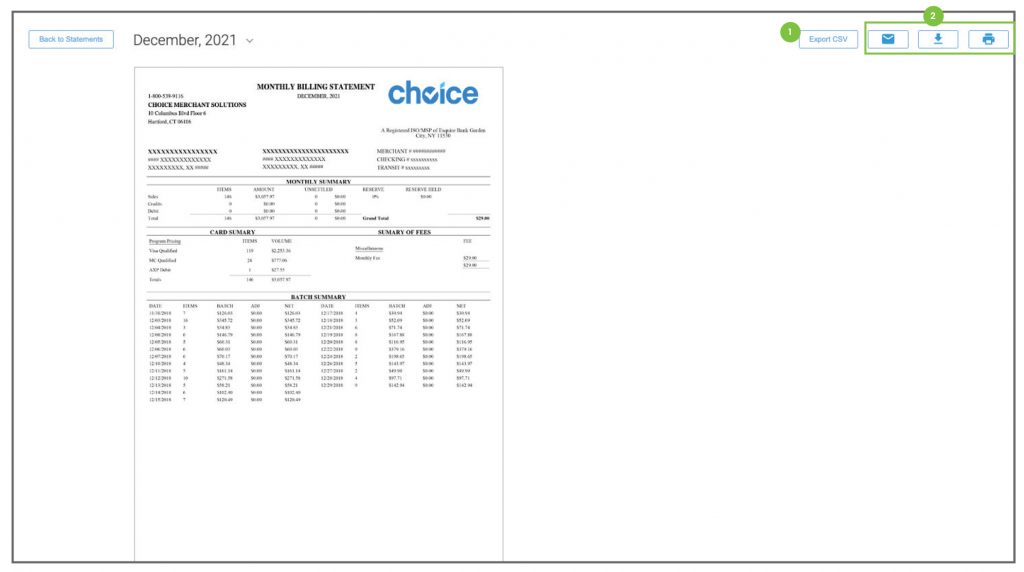
The Statements screen publishes the monthly processing statements. Click the Statements tab in the access bar at the top of the screen, or the button located in the left side menu to view the screen. Users can click on any statement in the list and review the details of any expenses billed to their account.
Image is used for illustration to visualize the instructions on how to use above.
Frequently Asked Questions
What is Run a Sale?
Run a Sale and Invoicing are eCommerce payment functions that can be added to the Business Portal. If you are interested in adding these payment options to your account, please contact your agent or reach out to Choice Customer Support.
I forgot my password, what do I do?
Click the Forgot Password link on the login screen. Enter the email address of the user trying to log in. A temporary password to the email address on file. Return to the log-in screen and enter the username and temporary password. The screen will prompt the user to create and confirm a new password. The password is now changed and the user may log in again.
What do I do if I forgot my password?
Click the Forgot Password link on the log in screen. Enter the email address of the
user trying to log in. A temporary password will be sent to that email address. This
email will come from donotreply@choice.dev. Return to the log in screen and enter
the username and temporary password. The screen will prompt the user to create
and confirm a new password. The password is now changed and the user may log in
again.
* Note: Make sure to add the choice.dev email as a contact in your email program. This will ensure the messages are not marked as spam or junk messages.
Why can't I void a sale?
Sales can only be voided before the system batches at the end of the day. If the sale
in question was run any day before then, it must be refunded instead of voided. This
will take 2-3 business days to return money to the customer.
Note: Transactions can also be voided or refunded from the transactions Tab. Locate the correct sale, click on the green View icon and click the Refund or Void button at the bottom of the screen. Follow the prompts to complete the process.
Why did my customer not receive their receipt?
Email communications are sent from donotreply@choice.dev. Make sure to inform
the customer to add the choice.dev email as a contact in their email program. This will
ensure the messages are not marked as spam or junk messages.
Text communications are sent (959) 230-0007. Make sure to inform the customer so they do not block the number.
Please contact Choice Support if you need more help. Thank you!
Want More Info? Send us a Request
"*" indicates required fields
Reseller Section
Video Walkthrough on how to setup applinks in Jarvis for Business Portal
Copyright © 2022 Choice Merchant Solutions. All Rights Reserved


